Showing posts with label G.T. Portfolio. Show all posts
Showing posts with label G.T. Portfolio. Show all posts
Friday, April 4, 2014
Practice Profile Story
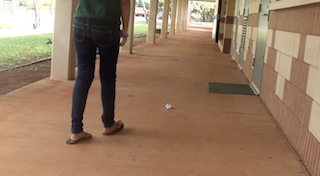
This quarter we had to make practice profile stories. We practiced with people from our groups and interviewed them about what there interests are or talents they might have. My team interviewed Kirklyn Nishida about how anime shaped her into the person she is today.
Our group had trouble getting things in on time. Honestly, we weren't that productive when we had to get into groups and work together. So when we had to turn in our final video, we weren't even done. We were one one of the few groups that didn't get our videos in.
Thursday, April 3, 2014
Composition Techniques
During the first quarter of the school year, my G.T. class had a project called "Composition Techniques." It was a project showing what the composition techniques looked like. Composition Techniques are usually used when you are filming or taking pictures.
There are fourteen types of composition techniques, rule of thirds, framing, unusual angles, leading lines, emotion, action, close up, reaction, contrast in content, repetition of shapes, group shot, parts of a whole, horizontal, and vertical. These fourteen techniques will make your video go from good to great. They make your video look interesting and more fun to watch.
Friday, March 28, 2014
Three Shot Sequences
 Three shot sequences are used to make take your video go from good to great. The shots go from Wide, Medium, and then to a Close up. Shot sequences are also used to show more detail in less time and an overall sense of purpose. Shot sequences make videos more interesting and fun to watch. If you only have one shot throughout your video it would be boring to watch and not interesting.
When filming you should film more than you what you need so when you go back to edit the video you could always enough. You can always go back and delete out whatever you don't need. You should always have at least two to three shot sequences.

Thursday, February 27, 2014
Final Photomontages


These are my two final photo montages inspired by David Hockney. Photo montages were created to make an illusion of an unreal subject. To make these, we first took multiple pictures of an inspirational place from two different perspectives. Then we batch edited the photos in Adobe Bridge Raw. After that we out the photos together in Photoshop. You need to put thought in these kinda things. Lastly we applied black or white backgrounds.
Thursday, February 13, 2014
Polar Panoramas


These are my two finished Polar Panoramas. I made these two images here in Kapaa Middle School in G.T class. To make polar panos, you first have to find a good place to take the pictures. I took my pictures in front of my house and at Lidgate park. Polar panos are very similar to spherical panos, the difference is that their looked at different perspectives.
I first edited the pictures I took (in front of my house and at Lidgate park) in Adobe Bridge to make the pictures have more clarity, brighter and look more real. In photoshop, I merged the photos together and warped the ends so the sides wouldn't be uneven. Then I resized the image into the shape of a square, rotated into 180 degree angle and applied the polar filter.
To add my portrait picture above, we first took a portrait session. After we took the pictures, we chose the pictures we wanted to use and edited them in Adobe Bridge to make them brighter and with more clarity. I then used the Quick Selection Tool to cut myself. I also refined the edges and resized the portrait so it could fit perfectly onto the polar pano. The last step was to make a shadow effect by copying, inverting and wrapping my portrait layer and decreasing the exposure down to black and adjusting the opacity to around 50 to 40 percent.
Monday, January 27, 2014
Spherical Panoramas


I first had to search what a spherical panorama was and how to actually create one. Then you look for a good location with an interesting horizon line. You then take ten photos from left to right with an even amount of overlapping, all vertically oriented. Using Camera Raw in Adobe Bridge I edited each photo too make them brighter and make them look more realistic. I then used Photoshop to merge the photos together and resized the photos to a shape of a square.
We then took a portrait photography session to make people get the feeling that were on top of the world! We then edited the portraits in Camera Raw using Adobe Bridge. Then in Photoshop, I used the Quick Selection Tool to cut myself out and paste it in my finished spherical panorama. Last but not least I created a shadow affect by copying and changing the size of the portrait layer, lowering the exposure to black and adjusting the capacity to about 50%.
Friday, January 10, 2014
Magazine Cover

Subscribe to:
Posts (Atom)