Friday, April 4, 2014
Practice Profile Story
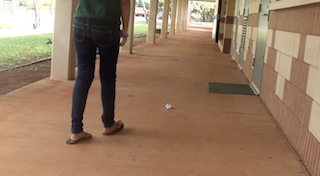
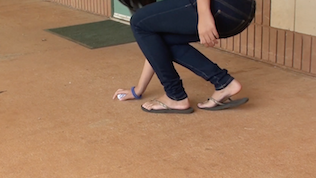
This quarter we had to make practice profile stories. We practiced with people from our groups and interviewed them about what there interests are or talents they might have. My team interviewed Kirklyn Nishida about how anime shaped her into the person she is today.
Our group had trouble getting things in on time. Honestly, we weren't that productive when we had to get into groups and work together. So when we had to turn in our final video, we weren't even done. We were one one of the few groups that didn't get our videos in.
Thursday, April 3, 2014
Composition Techniques
During the first quarter of the school year, my G.T. class had a project called "Composition Techniques." It was a project showing what the composition techniques looked like. Composition Techniques are usually used when you are filming or taking pictures.
There are fourteen types of composition techniques, rule of thirds, framing, unusual angles, leading lines, emotion, action, close up, reaction, contrast in content, repetition of shapes, group shot, parts of a whole, horizontal, and vertical. These fourteen techniques will make your video go from good to great. They make your video look interesting and more fun to watch.
Friday, March 28, 2014
Three Shot Sequences
 Three shot sequences are used to make take your video go from good to great. The shots go from Wide, Medium, and then to a Close up. Shot sequences are also used to show more detail in less time and an overall sense of purpose. Shot sequences make videos more interesting and fun to watch. If you only have one shot throughout your video it would be boring to watch and not interesting.
When filming you should film more than you what you need so when you go back to edit the video you could always enough. You can always go back and delete out whatever you don't need. You should always have at least two to three shot sequences.

Profile Project Progress
 For our profile project, we're interviewing Ian's dad, Kenneth Kimura. We're interviewing Kenneth on how going through what he's gone through shaped him in the person he is today. He went from being a janitor to a manager of Kauai Lagoons Pro Shop. We did this project to show people to always try your best because even thought Kenneth went through a lot he still thrives and this helped him understand the true meaning of success.
We had trouble getting together to film outside of school. We were one of the last groups to finish the Production Plan, but we were one of the first people to film B-Roll and the interview and get it done.
Our group can really improve a lot. Not just improving the visuals or the quality of the video, but to actually work as a team and to learn to get along. We can also improve by compromising with each other and to not always fight on the little edits in Final Cut Pro. We can always meet in the middle and to not get caught up in all the fighting that we've done but to work it out as a group.
Our group can improve our video from good to great by putting more B-Roll and to not show the cuts in the video whenever he's answering a different question. We can also improve our video by putting our video in order because during our video he talks about going to college and then he talks about how he loves soccer.
Thursday, February 27, 2014
Final Photomontages


These are my two final photo montages inspired by David Hockney. Photo montages were created to make an illusion of an unreal subject. To make these, we first took multiple pictures of an inspirational place from two different perspectives. Then we batch edited the photos in Adobe Bridge Raw. After that we out the photos together in Photoshop. You need to put thought in these kinda things. Lastly we applied black or white backgrounds.
Thursday, February 13, 2014
Practice Story Reflection

During our practice story session, my team did okay. The only thing we could've worked on more was teamwork. We didn't communicate well together and we were just doing our own thing. This is why we were behind on things. We looked around the room and saw the other groups working together, and getting their videos in on time. Then something happened, we spoke up and we told each other "hey, we need to work together to get this done."
I actually knew we weren't necessarily gonna get things on time. When we started our interview session we were fooling around and not really on track. Then when we started on the B-Roll session we only got one clip. When we started editing in Final Cut Pro we saw that we were lacking with B-Roll and by the time we found out that we needed more it was already to late.
So when the last thirty minutes came, we communicated with each other, we worked together and most importantly we did teamwork. Kirklyn Nishida and Ian Kimura edited the video in final cut pro while Mia Lopez and I were working on our transcription sheet. When Mr. Sanderl said that we had to start exporting, we weren't even close to finishing. But that didn't stop us from getting it done. Although we didn't really get things in on time, we finished it as a team!
Polar Panoramas


These are my two finished Polar Panoramas. I made these two images here in Kapaa Middle School in G.T class. To make polar panos, you first have to find a good place to take the pictures. I took my pictures in front of my house and at Lidgate park. Polar panos are very similar to spherical panos, the difference is that their looked at different perspectives.
I first edited the pictures I took (in front of my house and at Lidgate park) in Adobe Bridge to make the pictures have more clarity, brighter and look more real. In photoshop, I merged the photos together and warped the ends so the sides wouldn't be uneven. Then I resized the image into the shape of a square, rotated into 180 degree angle and applied the polar filter.
To add my portrait picture above, we first took a portrait session. After we took the pictures, we chose the pictures we wanted to use and edited them in Adobe Bridge to make them brighter and with more clarity. I then used the Quick Selection Tool to cut myself. I also refined the edges and resized the portrait so it could fit perfectly onto the polar pano. The last step was to make a shadow effect by copying, inverting and wrapping my portrait layer and decreasing the exposure down to black and adjusting the opacity to around 50 to 40 percent.
Subscribe to:
Posts (Atom)